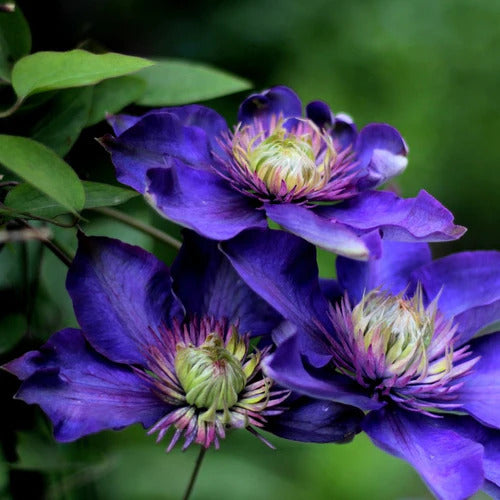
How To Grow Clematis From Seeds
Share
With its vibrant colors and delicate blooms, clematis is a favorite among garden enthusiasts. While many gardeners choose to propagate clematis through cuttings or by purchasing mature plants, growing it from seeds offers a uniquely rewarding experience.
In this guide, we'll take you through the step-by-step process of growing clematis from seeds, allowing you to witness the entire lifecycle of these beautiful vines right from the start.
1. Gathering Seeds: Start by collecting seeds from mature clematis plants. Seeds are typically found in the fluffy seed heads left behind after the flowers have faded. Gently pluck the seed heads and allow them to dry for a week or two in a cool, dry place. Once dried, gently crush the seed heads to release the seeds. Each fluffy seed head can contain numerous seeds.
2. Stratification: Clematis seeds often require a period of stratification to simulate winter conditions and break their dormancy. To achieve this, place the seeds in a damp paper towel, seal them in a plastic bag, and place them in refrigerator for 4-6 weeks, or several months during the winter, so that they go through several freeze/thaw cycles. This imitates the natural process of seeds experiencing cold temperatures over winter.
Place Clematis seeds in sterile seed starting mix, covering seeds with a thin layer of sand. Place the container into a zip lock polyethylene bag and place it in refrigerator for several months during the winter so that they go through several freeze/thaw cycles.
This procedure is called "cold stratification of seeds".
The good news for gardeners is that the natural cold stratification needed for germination can be forced with just a few materials, water, a refrigerator, and patience.
Stratification is a process of treating seeds to simulate natural conditions that the seeds must experience before germination can occur. Many seed species have an embryonic dormancy phase, and generally will not sprout until this dormancy is broken.
The keys to success when freezing seeds is storing dry seeds in an airtight container and keeping consistent cool temperatures. Seeds should be thoroughly dried before being frozen, as the freezing process can cause moist seeds to crack or split.
The dry seeds should then be placed in an airtight container to prevent them from absorbing any humidity and taking on any damaging moisture.
Lastly, when it is time to plant, take seeds out of the freezer and allow them to thaw at room temperature for at least 24 hours before planting them.
3. Soil Preparation: Select a sterile seed starting mix (made of perlite, vermiculite, and sphagnum peat moss). Fill small pots or seed trays with the potting mix, leaving about half an inch of space at the top. Moisten the soil gently without making it waterlogged.
4. Sowing Seeds: Sprinkle the stratified clematis seeds evenly over the soil surface in the pots or trays. Press them gently into the soil but avoid burying them too deep. Cover the seeds with a thin layer of fine soil, sand or vermiculite.
5. Providing the Right Environment: Clematis seeds require consistent moisture and a warm environment to germinate. Cover the pots or trays with clear plastic or place them in a propagator to maintain humidity. Position them in a well-lit area, but avoid direct sunlight, which could cause excessive heat buildup.
6. Germination: Germination time can vary, but you should start to see sprouts within a few weeks to a couple of months. Once the seedlings have grown a few true leaves, you can gently transplant them into slightly larger pots.
7. Transplanting Seedlings: Prepare larger pots with well-draining soil, a sterile soilless mix. Carefully remove the seedlings from their initial pots, taking care not to damage the delicate roots. Be very careful as the root will be a single long root in the beginning. Plant each seedling at the same depth it was growing before. Water the transplanted seedlings gently to settle the soil.
8. Providing Support: As the clematis seedlings grow, they will need support to climb. You can use small trellises or stakes to help them establish their climbing habit. And, as it grows larger it will need a larger pot, fertilizer and constant moisture.
9. Care and Maintenance: Keep your clematis seedlings well-watered but not waterlogged. When the plant has three sets of leaves, pinch out the growing tip to promote branching. They will appreciate regular fertilization with a balanced, water-soluble fertilizer. As they continue to grow, you can transplant them into larger containers or prepare them for outdoor planting.
10. Gradual Outdoor Transition: Before planting your clematis seedlings outdoors, ensure they are acclimated to the outdoor conditions. Start by placing them in a sheltered spot for a few hours each day, gradually increasing the exposure until they are ready for full sun.
Like most climbing plants, they must grow into the sun in order to flower.
Some clematis bloom times are in the spring, some in summer, some in autumn, and some are continuous through multiple seasons.
However, clematis needs at least two to three years to flourish because its complex root system takes time to establish.
Be very careful as the root will be a single long root in the beginning. As it grows larger it will need a larger pot, fertilizer and constant moisture.
When the plant has three sets of leaves, pinch out the growing tip to promote branching.
Conclusion: Growing clematis from seeds might require a bit more patience and effort compared to other propagation methods, but the sense of accomplishment and the opportunity to witness the entire growth process is truly remarkable.
With the right care and attention, your clematis seedlings will transform into vigorous vines, adorning your garden with their breathtaking blooms for years to come. So, roll up your sleeves, gather those seeds, and embark on this rewarding gardening journey!


